Kubernetes ingress controller for authenticating apps
August 14, 2018
Kubernetes Ingress has redefined the routing in this era of containerization and with all these freehand routing techniques the thought of "My router my rules" seems real.
We use nginx-ingress as a routing service for our applications. There is a lot more than routing we can do with ingress. One of the important features is setting up authentication using ingress for our application. As all the traffic goes from ingress to our service, it makes sense to setup authentication on ingress.
As mentioned in ingress repository there are different types of techniques available for authentication including:
- Basic authentication
- Client-certs authentication
- External authentication
- Oauth external authentication
In this blog, we will set up authentication for the sample application using basic ingress authentication technique.
Pre-requisites
-
Access to working kubernetes cluster.
-
Understanding of Kubernetes terms like pods, deployments, services, configmap, ingress and annotations
First, let's create ingress resources from upstream example by running the following command.
$ kubectl create -f https://raw.githubusercontent.com/kubernetes/ingress-nginx/master/deploy/mandatory.yaml
namespace "ingress-nginx" created
deployment "default-http-backend" created
service "default-http-backend" created
configmap "nginx-configuration" created
configmap "tcp-services" created
configmap "udp-services" created
serviceaccount "nginx-ingress-serviceaccount" created
clusterrole "nginx-ingress-clusterrole" created
role "nginx-ingress-role" created
rolebinding "nginx-ingress-role-nisa-binding" created
clusterrolebinding "nginx-ingress-clusterrole-nisa-binding" created
deployment "nginx-ingress-controller" created
Now that ingress controller resources are created we need a service to access the ingress.
Use following manifest to create service for ingress.
apiVersion: v1
kind: Service
metadata:
  annotations:
    service.beta.kubernetes.io/aws-load-balancer-backend-protocol: tcp
  labels:
    k8s-addon: ingress-nginx.addons.k8s.io
  name: ingress-nginx
  namespace: ingress-nginx
spec:
  externalTrafficPolicy: Cluster
  ports:
    - name: https
      port: 443
      protocol: TCP
      targetPort: http
    - name: http
      port: 80
      protocol: TCP
      targetPort: http
  selector:
    app: ingress-nginx
  type: LoadBalancer
Now, get the ELB endpoint and bind it with some domain name.
$kubectl create -f ingress-service.yml
service ingress-nginx created

$ kubectl -n ingress-nginx get svc  ingress-nginx -o wide
NAME            CLUSTER-IP      EXTERNAL-IP                                                               PORT(S)                      AGE       SELECTOR
ingress-nginx   100.71.250.56   abcghccf8540698e8bff782799ca8h04-1234567890.us-east-2.elb.amazonaws.com   80:30032/TCP,443:30108/TCP   10s       app=ingress-nginx
Let's create a deployment and service for our sample application kibana. We need elasticsearch to run kibana.
Here is manifest for the sample application.
---
apiVersion: extensions/v1beta1
kind: Deployment
metadata:
  labels:
    app: kibana
  name: kibana
  namespace: ingress-nginx
spec:
  replicas: 1
  template:
    metadata:
      labels:
        app: kibana
    spec:
      containers:
        - image: kibana:latest
          name: kibana
          ports:
            - containerPort: 5601
---
apiVersion: v1
kind: Service
metadata:
  annotations:
  labels:
    app: kibana
  name: kibana
  namespace: ingress-nginx

spec:
  ports:
    - name: kibana
      port: 5601
      targetPort: 5601
  selector:
    app: kibana
---
apiVersion: extensions/v1beta1
kind: Deployment
metadata:
  labels:
    app: elasticsearch
  name: elasticsearch
  namespace: ingress-nginx
spec:
  replicas: 1
  strategy:
    type: RollingUpdate
  template:
    metadata:
      labels:
        app: elasticsearch
    spec:
      containers:
        - image: elasticsearch:latest
          name: elasticsearch
          ports:
            - containerPort: 5601
---
apiVersion: v1
kind: Service
metadata:
  annotations:
  labels:
    app: elasticsearch
  name: elasticsearch
  namespace: ingress-nginx
spec:
  ports:
    - name: elasticsearch
      port: 9200
      targetPort: 9200
  selector:
    app: elasticsearch
Create the sample application.
kubectl apply -f kibana.yml
deployment "kibana" created
service "kibana" created
deployment "elasticsearch" created
service "elasticsearch" created
Now that we have created application and ingress resources, it's time to create an ingress and access the application.
Use the following manifest to create ingress.
apiVersion: extensions/v1beta1
kind: Ingress
metadata:
  annotations:
  name: kibana-ingress
  namespace: ingress-nginx
spec:
  rules:
    - host: logstest.myapp-staging.com
      http:
        paths:
          - path: /
            backend:
              serviceName: kibana
              servicePort: 5601
$kubectl -n ingress-nginx create -f ingress.yml
ingress "kibana-ingress" created.
Now that our application is up, when we access the kibana dashboard using URL http://logstest.myapp-staging.com We directly have access to our Kibana dashboard and anyone with this URL can access logs as shown in the following image.

Now, let's set up a basic authentication using htpasswd.
Follow below commands to generate the secret for credentials.
Let's create an auth file with username and password.
$ htpasswd -c auth kibanaadmin
New password: <kibanaadmin>
New password:
Re-type new password:
Adding password for user kibanaadmin
Create k8s secret.
$ kubectl -n ingress-nginx create secret generic basic-auth --from-file=auth
secret "basic-auth" created
Verify the secret.
kubectl get secret basic-auth -o yaml
apiVersion: v1
data:
  auth: Zm9vOiRhcHIxJE9GRzNYeWJwJGNrTDBGSERBa29YWUlsSDkuY3lzVDAK
kind: Secret
metadata:
  name: basic-auth
  namespace: ingress-nginx
type: Opaque
Use following annotations in our ingress manifest by updating the ingress manifest.
kubectl -n ingress-nginx edit ingress kibana ingress
Paste the following annotations
nginx.ingress.kubernetes.io/auth-type: basic
nginx.ingress.kubernetes.io/auth-secret: basic-auth
nginx.ingress.kubernetes.io/auth-realm: "Kibana Authentication Required - kibanaadmin"
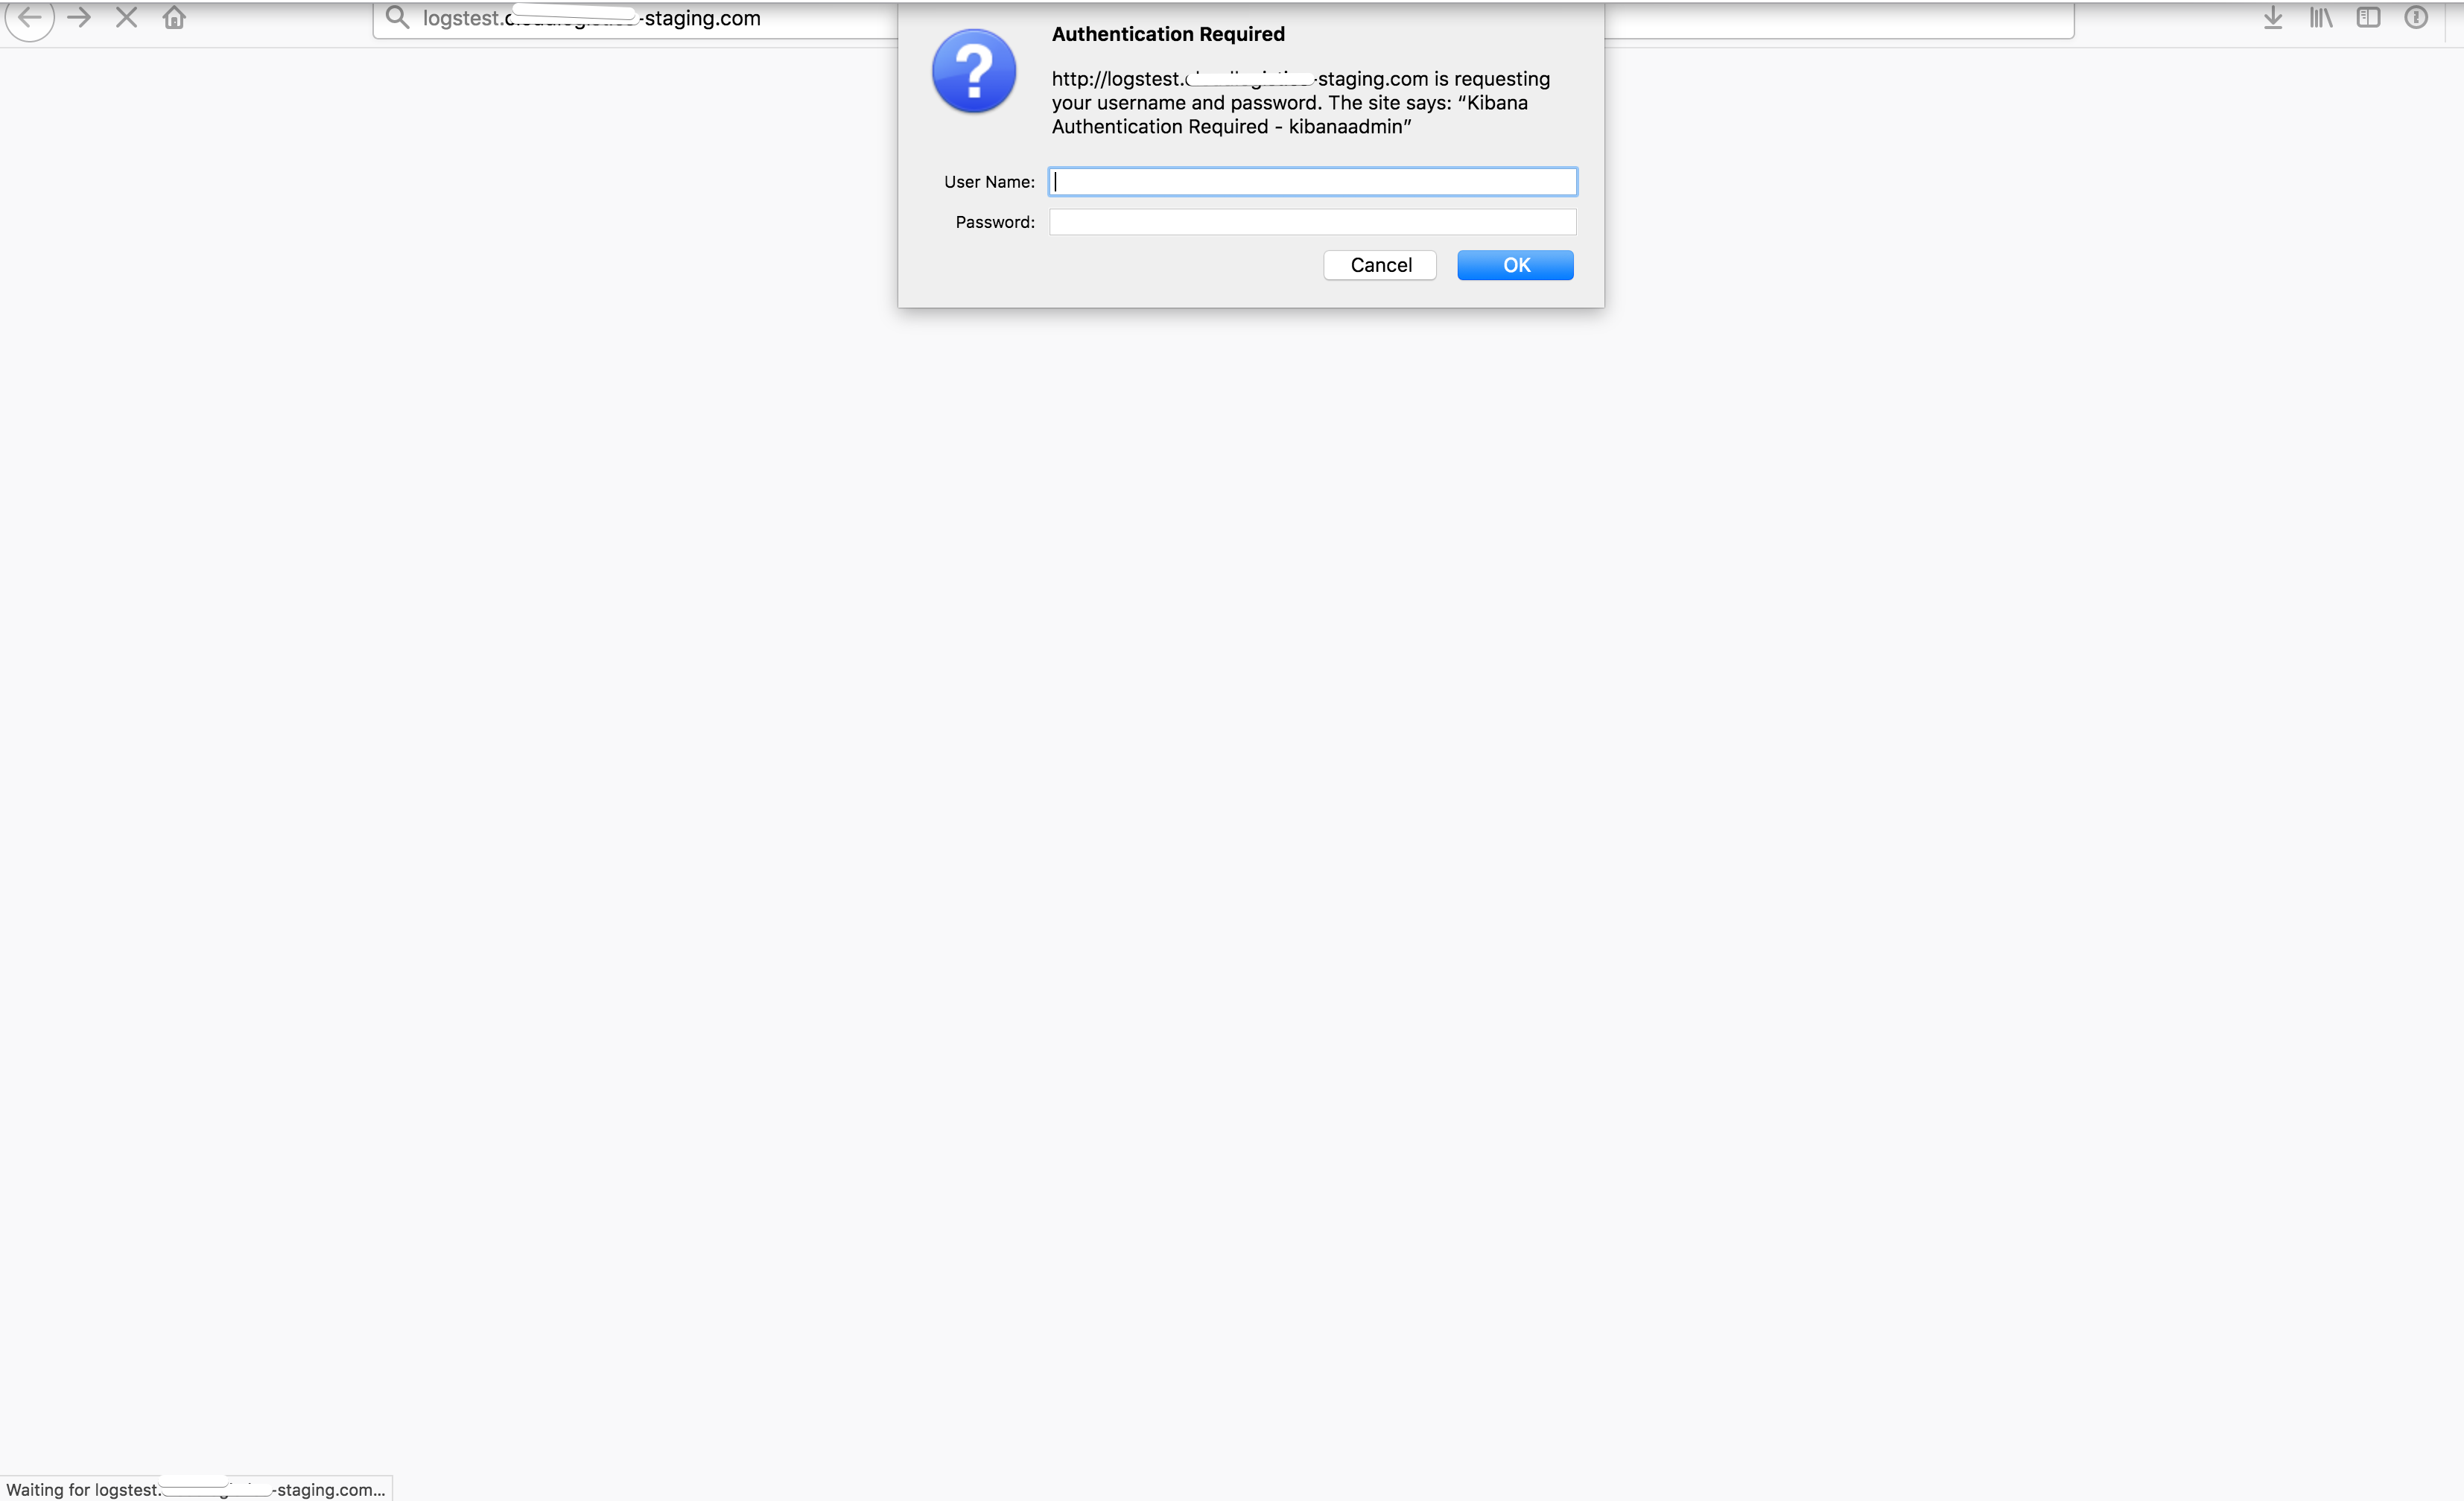
Now that ingress is updated, hit the URL again and as shown in the image below we are asked for authentication.

Follow @bigbinary on X. Check out our full blog archive.